As an Amazon Associate, we earn from qualifying purchases. This does not affect the price you pay or the quality of the products you buy. For more information, please read the full affiliate disclosure here.
Have you ever experienced a situation where your Onan generator won’t start, no matter how many times you try? You check the battery, the fuel, and the oil, and everything seems fine. But there is no spark. What could be the problem?
A no-spark issue is one of the most frustrating and common problems that Onan generator owners face. It means that the generator is not getting the electric charge it needs to ignite the fuel and run the engine. Without a spark, your generator is useless.
A lack of spark on an Onan generator can be caused by various factors, such as a faulty spark plug, a bad ignition coil, a broken flywheel key, a low oil level, a bad starter solenoid, or a wiring issue.
But don’t worry; there is a solution. In this blog post, we will show you how to troubleshoot and fix a no-spark issue in your Onan generator. Let’s get started!
6 Reasons Why Onan Generators Are Not Getting Spark And How to Fix Them

1: Damaged or Faulty Spark Plug
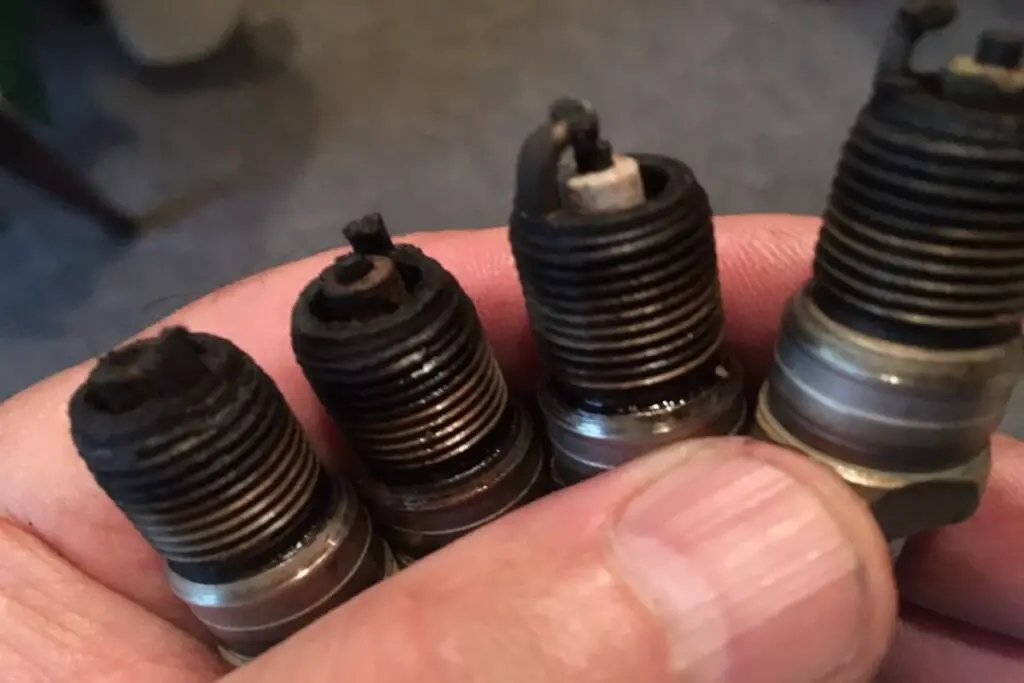
A spark plug is a device that delivers electric charge to the engine. It has two electrodes that create a spark when they are connected by a high voltage from the ignition coil. The spark then ignites the fuel-air mixture in the cylinder, creating a combustion that drives the piston.
However, if the spark plug is dirty, faulty, damaged, or has the wrong gap, it will not be able to generate the spark properly. This can result in a no-spark issue in the generator.
To troubleshoot and fix a faulty spark plug, you will need a spark plug wrench, a feeler gauge, and a new spark plug. Here are the steps you can follow:
- Remove the spark plug from the engine by using the spark plug wrench. You may need to remove the air filter or the cover to access the spark plug.
- Inspect the spark plug for any signs of dirt, corrosion, or cracks. If the spark plug is dirty, you can clean it with a wire brush or a rag. If the spark plug is damaged, you will need to replace it with a new one.
- Measure the gap between the electrodes with the feeler gauge. The recommended gap for most Onan generators is 0.025 inches. If the gap is too wide or too narrow, you can adjust it by bending the electrode slightly with a flat screwdriver or a pair of pliers.
- Reinstall the spark plug into the engine by using the spark plug wrench. Do not overtighten the spark plug, as this can damage the threads or the electrodes.
- Test the spark plug by attaching it to the spark plug wire and holding it near a metal surface. Then, crank the engine and look for a spark. If you see a spark, it means that the spark plug is good. If not, you may need to replace it or check the ignition coil.
ALSO READ: Onan 5500 Marquis Gold Generator Spark Plug
2: Bad or Faulty Ignition Coil
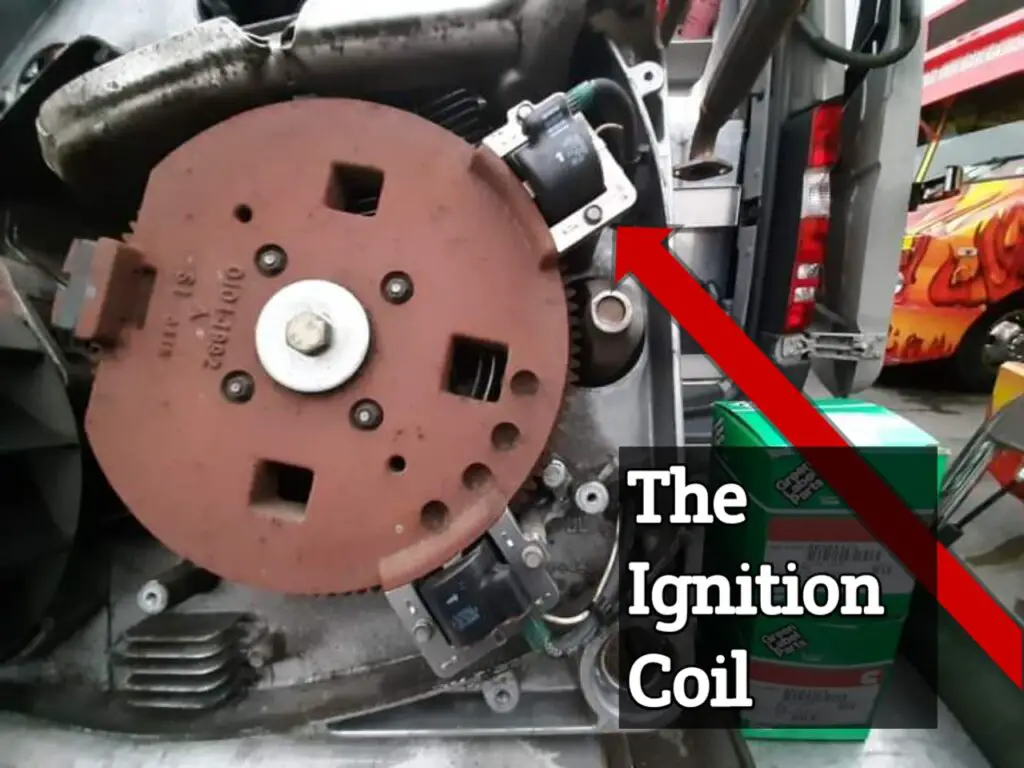
Secondly, the ignition coil can also cause your generator to generate no spark. The ignition coil is a component that transforms the low voltage from the battery into a high voltage for the spark plug. It consists of a primary winding and a secondary winding that are wrapped around an iron core.
When the ignition switch is turned on, the current flows through the primary winding, creating a magnetic field. When the ignition switch is turned off, the magnetic field collapses, inducing a high voltage in the secondary winding. This high voltage then travels to the spark plug through the spark plug wire, creating a spark.
However, if the ignition coil is disconnected, faulty, or grounded, it will not be able to supply the electric charge to the spark plug. This can result in a no-spark issue in the generator.
To troubleshoot and fix a bad ignition coil, you will need a multimeter, a new ignition coil, and some electrical tape. Here are the steps you can follow:
- Locate the ignition coil on the engine. It is usually a black or silver cylinder with two wires attached to it. One wire goes to the spark plug, and the other wire goes to the ignition switch or the battery.
- Disconnect the wires from the ignition coil by pulling them gently. You may need to use a screwdriver or a pair of pliers to loosen the connectors.
- Set the multimeter to the ohms setting and measure the resistance between the two terminals of the ignition coil. The resistance should be between 0.4 and 2 ohms. If the resistance is too high or too low, it means that the coil is faulty and needs to be replaced.
- Replace the ignition coil with a new one, and reconnect the wires to the terminals. Make sure that the connections are tight and secure. You can use some electrical tape to wrap the wires and prevent them from touching the metal parts of the engine.
- Test the ignition coil by attaching the spark plug to the spark plug wire and holding it near a metal surface. Then, crank the engine and look for a spark. If you see a spark, it means that the ignition coil is good. If not, you may need to check the wiring or the spark plug.
ALSO READ: 8 Common Reasons Why Onan Generator Not Cranking and Solutions
3: Broken Flywheel Key
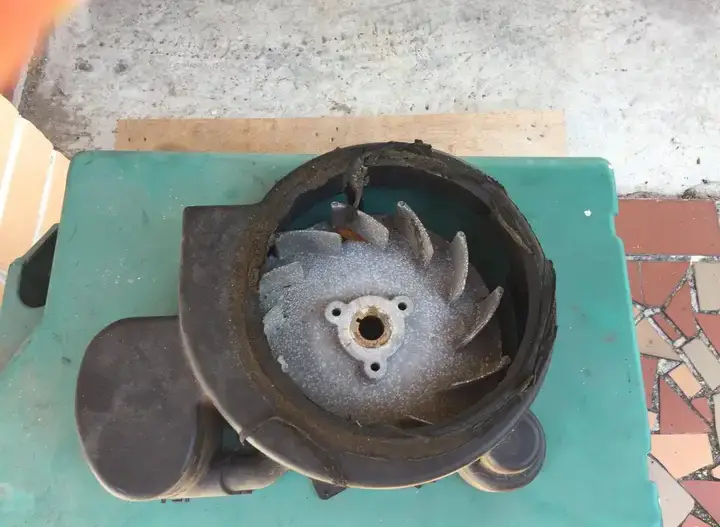
The flywheel is a large metal wheel that is attached to the crankshaft of the engine. It helps to balance the engine and store rotational energy. The flywheel also has a small metal piece called the flywheel key, which aligns the flywheel with the crankshaft and the ignition coil. The flywheel key ensures that the spark occurs at the right time when the piston is at the top of the compression stroke.
However, if the flywheel key is broken, sheared, or worn out, it will cause the flywheel to rotate out of sync with the crankshaft and the ignition coil. This will result in a no-spark issue in the generator, as the spark will not occur at the right time.
To troubleshoot and fix a broken flywheel key, you will need a socket wrench, a flywheel puller, a hammer, a punch, and a new flywheel key. Here are the steps you can follow:
- Remove the flywheel cover from the engine by using the socket wrench. You may need to remove the air filter or the cover to access the flywheel cover.
- Remove the nut that holds the flywheel to the crankshaft by using the socket wrench. You may need to use a screwdriver or a pair of pliers to hold the flywheel in place while you loosen the nut.
- Attach the flywheel puller to the flywheel by using the bolts and the nuts. The flywheel puller is a tool that helps to remove the flywheel from the crankshaft without damaging it. You can buy one online or from a hardware store.
- Tighten the center bolt of the flywheel puller by using the socket wrench. This will apply pressure to the flywheel and pull it out of the crankshaft. You may need to tap the flywheel with a hammer to loosen it.
- Remove the flywheel and the flywheel puller from the engine. You will see the flywheel key on the crankshaft or the flywheel. Inspect the flywheel key for any signs of damage or wear. If the flywheel key is broken, sheared, or worn out, you will need to replace it with a new one.
- Remove the old flywheel key from the crankshaft or the flywheel by using the hammer and the punch. Be careful not to damage the crankshaft or the flywheel.
- Install the new flywheel key into the slot on the crankshaft or the flywheel. Make sure that the flywheel key is aligned with the notch on the flywheel and the ignition coil.
- Reinstall the flywheel onto the crankshaft by aligning the flywheel key with the slot on the flywheel. Make sure that the flywheel is seated properly on the crankshaft.
- Reinstall the nut that holds the flywheel to the crankshaft by using the socket wrench. Do not overtighten the nut, as this can damage the flywheel or the crankshaft.
- Reinstall the flywheel cover onto the engine by using the socket wrench. You may need to reinstall the air filter or the cover as well.
- Test the flywheel key by attaching the spark plug to the spark plug wire and holding it near a metal surface. Then, crank the engine and look for a spark. If you see a spark, it means that the flywheel key is good. If not, you may need to check the spark plug or the ignition coil.
ALSO READ: How to Troubleshoot Onan Generator Starter Problems
4: Wiring Issue
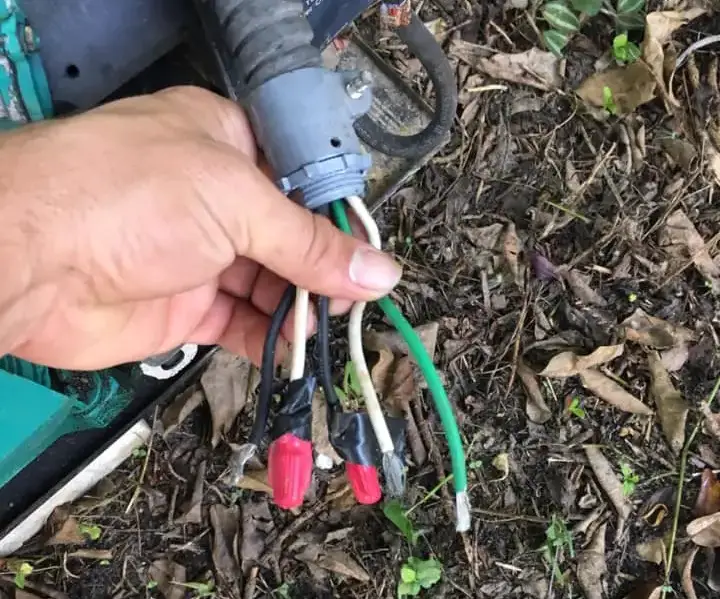
The wiring of the generator connects the battery, the ignition switch, the ignition coil, the spark plug, and the voltage regulator. It ensures the flow of current and voltage to the various components and systems. However, if the wiring is damaged, broken, or short-circuited, it can interfere with the spark generation.
A wiring issue can be caused by various factors, such as corrosion, wear and tear, rodents, or accidental cuts. It can result in a no spark issue in the generator, as the current and voltage will not reach the spark plug or the ignition coil.
To troubleshoot and fix a wiring issue, you will need a multimeter, some electrical tape, and some wire connectors. Here are the steps you can follow:
- Locate the wiring of the generator on the engine. It is usually a bundle of wires that are wrapped in a plastic or rubber casing. You may need to remove the air filter or the cover to access the wiring.
- Disconnect the wiring from the battery, the ignition switch, the ignition coil, the spark plug, and the voltage regulator by pulling them gently. You may need to use a screwdriver or a pair of pliers to loosen the connectors.
- Set the multimeter to the continuity or resistance setting, and test the wiring for any breaks or shorts. To do this, touch the probes of the multimeter to the ends of each wire, and look at the reading. If the reading is zero or very low, it means that the wire is intact and has continuity. If the reading is very high or infinite, it means that the wire is broken or has a short circuit.
- Inspect the wiring for any signs of damage, corrosion, or loose connections. If the wiring is damaged, you can repair it by using some electrical tape or some wire connectors. To do this, cut off the damaged part of the wire, strip off the insulation from both ends and twist them together. Then, cover the exposed wires with some electrical tape or a wire connector. Make sure that the wires are not touching any metal parts of the engine or the generator.
- Reconnect the wiring to the battery, the ignition switch, the ignition coil, the spark plug, and the voltage regulator by pushing them gently. You may need to use a screwdriver or a pair of pliers to tighten the connectors. Make sure that the connections are tight and secure. You can use some electrical tape to wrap the wires and prevent them from touching the metal parts of the engine or the generator.
- Test the wiring by attaching the spark plug to the spark plug wire and holding it near a metal surface. Then, crank the engine and look for a spark. If you see a spark, it means that the wiring is good. If not, you may need to check the battery, the ignition switch, the spark plug, or the ignition coil.
ALSO READ: How to Jumpstart an Onan RV Generator: Expert Guide
5: Low Oil Level and Oil Sensor
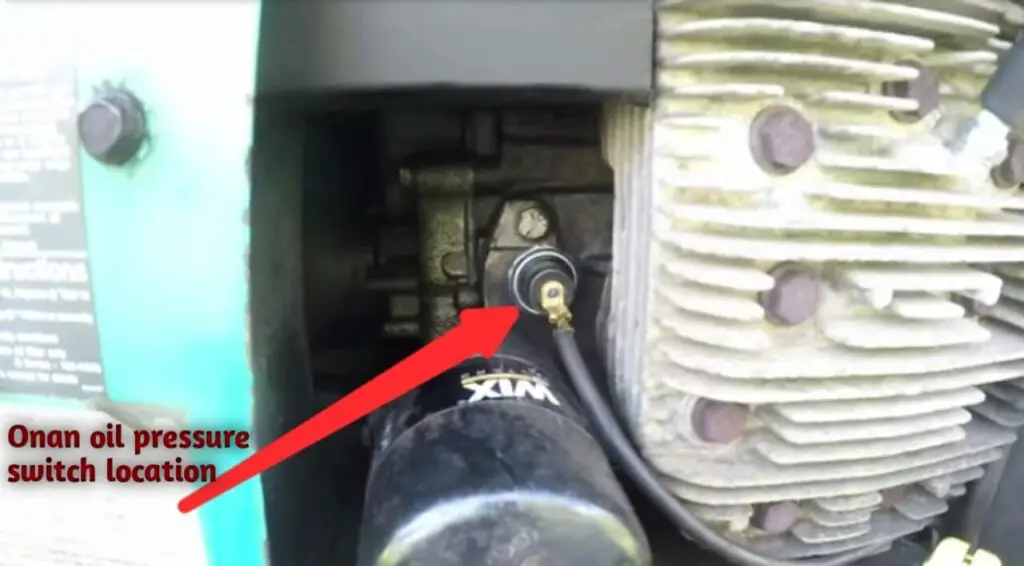
The oil level in the generator is another factor that can affect the spark generation. The oil helps to lubricate and cool the engine and prevent friction and overheating. However, if the oil level is too low, it can cause damage to the engine and reduce its performance.
The oil sensor is a device that monitors the oil level in the generator. It is usually a small metal rod that extends into the oil pan. When the oil level is sufficient, the rod is submerged in the oil and completes a circuit. When the oil level is low, the rod is exposed and breaks the circuit. This triggers a warning light or a shutdown mechanism that prevents the generator from starting or running.
However, sometimes the oil sensor can malfunction or become faulty. It can give a false reading of the oil level, or fail to trigger the warning or shutdown. This can result in a no spark issue in the generator, as the oil sensor will not allow the generator to start or run.
To troubleshoot and fix a low oil level and oil sensor issue, you will need a dipstick, some engine oil, a wrench, and a new oil sensor. Here are the steps you can follow:
- Check the oil level in the generator by using the dipstick. The dipstick is a long metal rod that has markings to indicate the minimum and maximum oil levels. You can find the dipstick near the oil filler cap on the engine. To check the oil level, you need to remove the dipstick, wipe it clean, insert it back into the oil pan, and pull it out again. Then, look at the markings and see where the oil level is. The oil level should be between the minimum and maximum marks. If the oil level is below the minimum mark, you need to add some engine oil to the generator. If the oil level is above the maximum mark, you need to drain some engine oil from the generator.
- Add or drain the engine oil as needed by using the oil filler cap and the oil drain plug. The oil filler cap is a round cap that covers the opening where you pour the oil into the engine. The oil drain plug is a bolt that seals the bottom of the oil pan. To add oil, you need to remove the oil filler cap, pour the oil slowly into the engine, and check the oil level with the dipstick. To drain oil, you need to place a container under the oil pan, remove the oil drain plug with a wrench, and let the oil flow out. Then, reinstall the oil drain plug and tighten it with a wrench.
- Check the oil sensor for any signs of damage or wear. The oil sensor is usually located on the side or the bottom of the engine, near the oil pan. It is a small metal cylinder with a wire attached to it. To check the oil sensor, you need to disconnect the wire from the sensor by pulling it gently. You may need to use a screwdriver or a pair of pliers to loosen the connector. Then, inspect the sensor for any signs of dirt, corrosion, or cracks. If the sensor is dirty, you can clean it with a rag or a brush. If the sensor is damaged, you need to replace it with a new one.
- Replace the oil sensor with a new one by using a wrench. To replace the oil sensor, you need to unscrew the old sensor from the engine by using a wrench. Then, screw the new sensor into the engine by using a wrench. Make sure that the sensor is tight and secure. Then, reconnect the wire to the sensor by pushing it gently. You may need to use a screwdriver or a pair of pliers to tighten the connector.
- Test the oil level and the oil sensor by starting the generator and looking for a spark. If the generator starts and runs smoothly, it means that the oil level and the oil sensor are good. If not, you may need to check the spark plug or the ignition coil.
If you don’t have the opportunity to change the oil sensor yourself, you can also bypass it. Here’s a detailed guide on how you can bypass your Onan generator oil sensor and its location.
6: Faulty Starter Solenoid
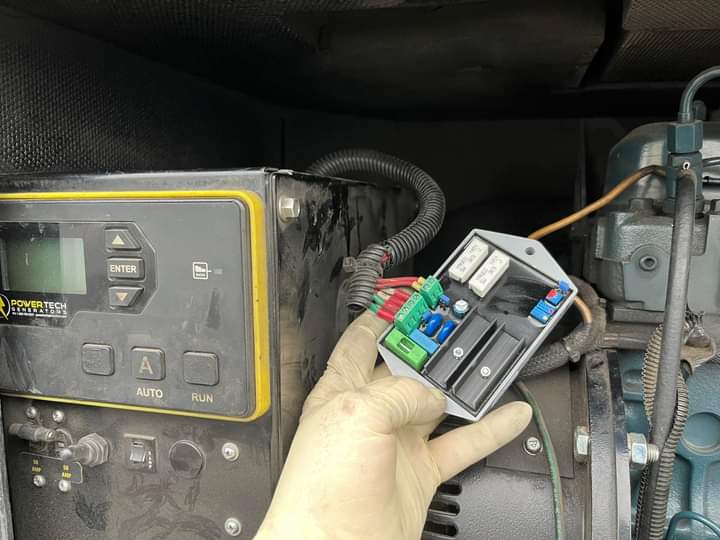
The starter solenoid is a device that acts as a switch between the battery and the starter motor. It receives a small electric current from the ignition switch when the key is turned, and then sends a large electric current to the starter motor to crank the engine. The starter solenoid also engages the flywheel and the crankshaft, which are essential for spark generation.
However, if the starter solenoid is faulty, it will not be able to send the electric current to the starter motor or engage the flywheel and the crankshaft. This can result in a no spark issue in the generator, as the engine will not crank or fire.
To troubleshoot and fix a faulty starter solenoid, you will need a multimeter, a screwdriver, a wrench, and a new starter solenoid. Here are the steps you can follow:
- Locate the starter solenoid on the generator. It is usually a small metal cylinder with two large terminals and one small terminal. It is connected to the battery, the starter motor, and the ignition switch by wires. You may need to remove the air filter or the cover to access the starter solenoid.
- Disconnect the wires from the starter solenoid by using the screwdriver or the wrench. You may need to label the wires to remember their positions. Be careful not to touch the wires or the terminals with your bare hands, as they may be live.
- Set the multimeter to the ohms setting, and measure the resistance between the two large terminals of the starter solenoid. The resistance should be close to zero. If the resistance is very high or infinite, it means that the starter solenoid is faulty and needs to be replaced.
- Set the multimeter to the volts setting, and measure the voltage between the small terminal and the ground. The voltage should be around 12 volts when the key is turned to the start position. If the voltage is too low or zero, it means that there is a problem with the ignition switch or the wiring. If the voltage is normal, it means that the starter solenoid is faulty and needs to be replaced.
- Replace the starter solenoid with a new one, and reconnect the wires to the terminals. Make sure that the connections are tight and secure. You can use some electrical tape to wrap the wires and prevent them from touching the metal parts of the generator.
- Test the starter solenoid by starting the generator and looking for a spark. If the generator starts and runs smoothly, it means that the starter solenoid is good. If not, you may need to check the starter motor or the flywheel.
ALSO READ: How to Remove an Onan Generator from an RV in 3 Simple Ways + Video
Final Words
Onan generators are reliable and durable machines that can provide you with power when you need it. However, they can also encounter some problems, such as no spark, that can prevent them from starting. By following the steps and tips in this blog post, you can troubleshoot and fix a no spark issue in your Onan generator, and enjoy its benefits for a long time.
Stay Connected with Us!
Follow us on Facebook and Twitter for the latest updates on staying safe online. Don't forget to subscribe for more tips directly in your inbox!
Follow on Facebook Follow on X Follow on Pinterest Join Our Private Facebook Group