As an Amazon Associate, we earn from qualifying purchases. This does not affect the price you pay or the quality of the products you buy. For more information, please read the full affiliate disclosure here.
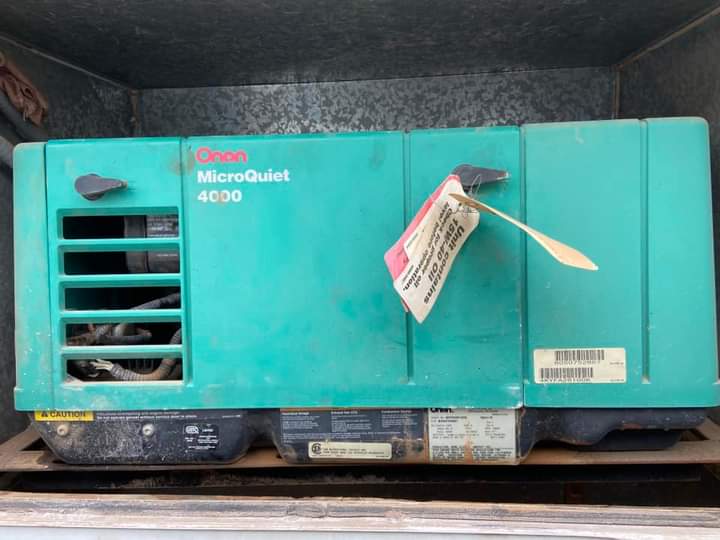
If you own an Onan 4000 generator, you know how reliable and convenient it is for your RV, camper, or trailer. But what if one day you try to start it and nothing happens? No sound, no movement, no power. What could be the problem, and how can you fix it?
In this post, I will share with you some of the possible causes and solutions for an Onan 4000 generator that will not crank.
But before we dive into the details, let me explain what cranking means and why it is important for your generator.
Cranking is the process of turning the engine over by using the starter motor and the battery. It is the first step in starting your generator and producing electricity. If your generator does not crank, it means that the engine is not rotating and there is no spark or fuel delivery to ignite the combustion.
Many factors can prevent your generator from cranking, such as:
- A dead or weak battery
- A faulty starter motor or solenoid
- A bad ignition switch or wiring
- A blown fuse or circuit breaker
- A low oil level or pressure
- A dirty or clogged air filter or fuel filter
- stale or contaminated fuel
To diagnose and fix your generator, you will need some basic tools and skills, such as:
- A multimeter or a voltmeter to measure voltage and resistance
- A socket wrench or a screwdriver to remove and tighten bolts and screws
- A spark plug tester or a spark plug wrench to check and replace spark plugs
- A fuel pressure gauge or a fuel line disconnect tool to check and replace fuel lines and filters
- A funnel and a container to drain and refill oil and fuel
- And a compressed air canister or a brush to clean air filters and carburetors
Of course, if you are not comfortable or confident with working on your generator yourself, you can always seek professional help from a qualified technician.
But if you are willing to give it a try, here are some steps you can follow to troubleshoot and fix your Onan 4000 generator that will not crank:

Step 1: Check the battery.
The battery is the most common cause of a generator that will not crank. If the battery is dead or weak, it will not provide enough power to turn the starter motor and the engine. To check the battery, you will need a multimeter or a voltmeter. Set it to DC voltage mode, and connect the red probe to the positive terminal of the battery and the black probe to the negative terminal. You should see a reading of at least 12 volts on the display. If the reading is lower than 12 volts, you will need to charge or replace the battery. You can also try to jump-start your generator using another battery or a vehicle, but make sure you follow the proper procedure and safety precautions.
RECOMMENDED READ:- Onan Generator Only Runs When Holding the Start Button: Causes, Solutions, and Troubleshooting Guide
Step 2: Check the starter motor and solenoid
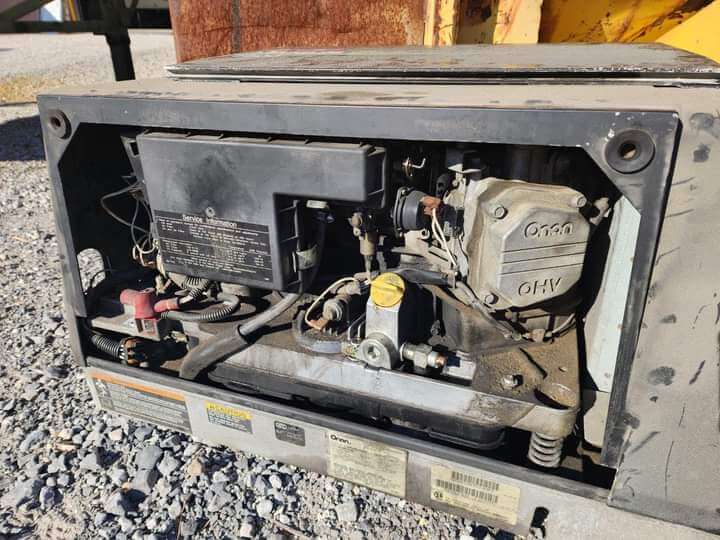
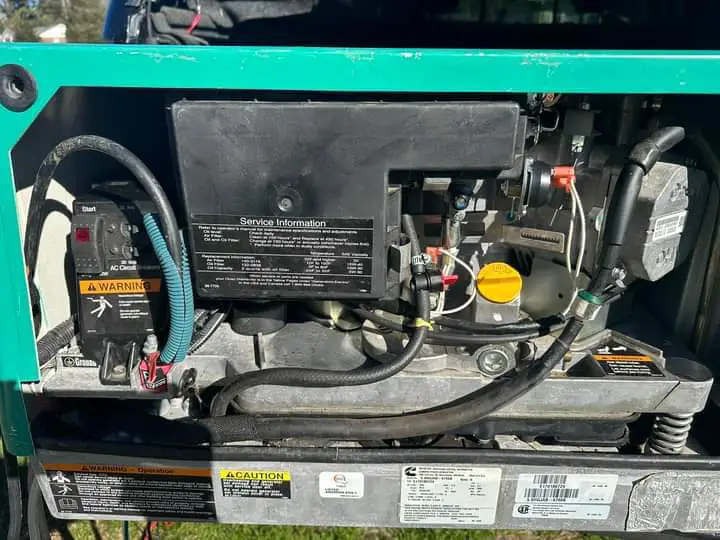
The starter motor is an electric motor that spins the engine when you turn the ignition switch. The solenoid is an electromagnet that engages and disengages the starter motor from the flywheel. If either of these components is faulty, your generator will not crank. To check them, you will need to access them by removing the cover of your generator. You will also need a multimeter or a voltmeter. First, disconnect the wires from the starter motor and solenoid. Then, set your multimeter to resistance mode (ohms) and connect one probe to one terminal of the starter motor and the other probe to the other terminal. You should see a reading of less than 1 ohm on the display. If the reading is higher than 1 ohm, your starter motor is bad and needs to be replaced. Next, connect one probe to one terminal of the solenoid and the other probe to the other terminal. You should see a reading of less than 5 ohms on the display. If the reading is higher than 5 ohms, your solenoid is bad and needs to be replaced.
RECOMMENDED READ:- How to Jumpstart an Onan RV Generator: Expert Guide
Step 3: Check the ignition switch and wiring.
The ignition switch is a key-operated switch that sends power from the battery to the starter motor and solenoid when you turn it on. The wiring is a network of wires that connects all the electrical components of your generator. If either of these components is damaged or loose, your generator will not crank. To check them, you will need a multimeter or a voltmeter. First, locate the ignition switch on your generator panel and remove it from its socket. Then, set your multimeter to continuity mode (beep) and connect one probe to the terminal that connects to the battery and the other probe to the terminal that connects to the starter motor and solenoid. You should hear a beep when you turn the switch on and no beep when you turn it off. If you hear no beep at all or a constant beep, your ignition switch is bad and needs to be replaced. Next, inspect the wiring for any signs of corrosion, fraying, or disconnection. If you find any, you will need to clean, repair, or replace the wiring as needed.
Step 4: Check the fuse and circuit breaker.
The fuse and circuit breaker are safety devices that protect your generator from overloading or short-circuiting. If either of these components is blown or tripped, your generator will not crank. To check them, you will need to locate them on your generator panel and remove them from their sockets. Then, set your multimeter to continuity mode (beep) and connect one probe to one end of the fuse or circuit breaker and the other probe to the other end. You should hear a beep if they are good and no beep if they are bad. If they are bad, you will need to replace them with the same type and rating.
Step 5: Check the oil level and pressure.
The oil level and pressure are important for lubricating and cooling your engine. If the oil level is too low or the pressure is too high, your generator will not crank. To check them, you will need to locate the oil dipstick and the oil pressure switch on your engine. First, pull out the dipstick and wipe it with a clean cloth. Then, insert it back into its tube and pull it out again. You should see a mark on the dipstick that indicates the proper oil level. If the oil level is below the mark, you will need to add more oil until it reaches the mark. If the oil level is above the mark, you will need to drain some oil until it reaches the mark. Next, disconnect the wire from the oil pressure switch and connect it to a ground source, such as the engine block or frame. Then, try to start your generator. If it cranks, your oil pressure switch is bad and needs to be replaced. If it does not crank, your oil pressure switch is good, and you can reconnect it.
Step 6: Check the air filter and fuel filter.
The air filter and fuel filter are important for providing clean air and fuel to your engine. If either of these components is dirty or clogged, your generator will not crank. To check them, you will need to access them by removing the cover of your generator. You will also need a compressed air canister or a brush to clean them. First, locate the air filter on your carburetor and remove it from its housing. Then, inspect it for any signs of dirt, dust, or debris. If you find any, you will need to clean it by blowing compressed air through it or brushing it gently with a soft brush. Next, locate the fuel filter on your fuel line and disconnect it from both ends. Then, inspect it for any signs of rust, sediment, or contamination. If you find any, you will need to replace it with a new one.
RECOMMENDED READ:- How to Clean Generator Air Filter in 8 Simple Ways +Video
Step 7: Check the fuel quality and quantity.
Fuel quality and quantity are important for providing enough energy to your engine. If the fuel is stale or contaminated, or if there is not enough fuel in the tank, your generator will not crank. To check them, you will need a funnel and a container to drain and refill fuel. First, locate the fuel tank on your generator and remove its cap. Then, look inside and see how much fuel is left in the tank. If there is less than a quarter of a tank left, you will need to add more fresh fuel until it reaches at least half of a tank full. Next, drain some fuel from the tank into a clear container using a funnel. Then, look at the color and smell of the fuel in the container. If the fuel is dark or cloudy, or if it smells sour or stale, you will need to drain all of it from the tank and refill it with fresh fuel.
Final Thought
If you have followed all these steps and your Onan 4000 generator still does not crank, there may be other issues that require more advanced diagnosis and repair. In that case, I recommend that you contact an authorized Onan service center or dealer for further assistance.
I hope this blog post has been helpful for you in troubleshooting and fixing your Onan 4000 generator that will not crank. If you have any questions or comments, please feel free to leave them below.
Share


